
首页 > 教程 >
ThinkPHP中自定义错误、成功、异常提示页面的方法
2023-02-16教程围观次
简介ThinkPHP提供了自带的错误提示页面,但是并不美观,提示信息显示如下:我们如果想要更换提示页面应该怎么做呢?以ThinkPHP3.2为例:在应用配置文件(应用文件目录/Common/Conf/config.php)中添加:/*错误页面模板*/'TMPL_ACTION_ERROR'=>'Public/dispatch_jump.html',//默认错误跳转对应的模板文件''TMPL_ACTION
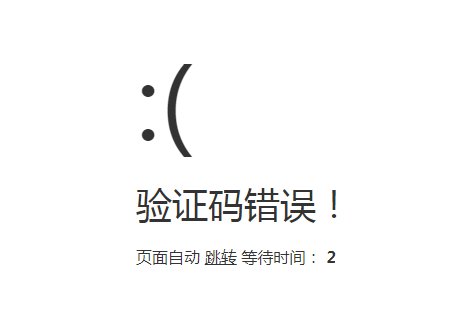
ThinkPHP提供了自带的错误提示页面,但是并不美观,提示信息显示如下:
我们如果想要更换提示页面应该怎么做呢?
以ThinkPHP3.2为例:
在应用配置文件(应用文件目录/Common/Conf/config.php)中添加:
/* 错误页面模板 */'TMPL_ACTION_ERROR' => 'Public/dispatch_jump.html', // 默认错误跳转对应的模板文件''TMPL_ACTION_SUCCESS' => 'Public/dispatch_jump.html', // 默认成功跳转对应的模板文件'//'TMPL_EXCEPTION_FILE' => 'Public/exception.html',// 异常页面的模板文件
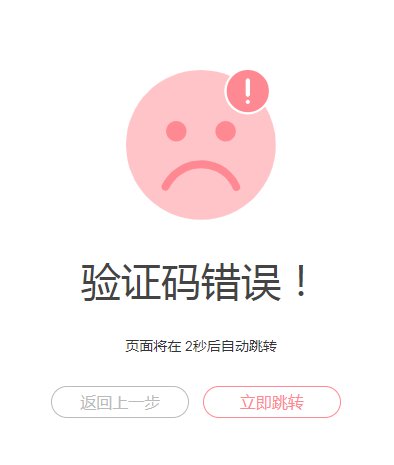
然后我是在项目公共文件(项目目录/Public)中新建了dispatch_jump.html,模板内容如下:
<!DOCTYPE html><html><head>< http-equiv="Content-Type" content="text/html; charset=utf-8" />< >跳转提示</ >< name="viewport" content="width=device-width, initial-scale=1.0"><style type="text/css">*{box-sizing:border-box;margin:0;padding:0;font-family:Lantinghei SC,Open Sans,Arial,Hiragino Sans GB,Microsoft YaHei,"微软雅黑",STHeiti,WenQuanYi Micro Hei,SimSun,sans-serif;-webkit-font-smoothing:antialiased}body{padding:70px 0;background:#edf1f4;font-weight:400;font-size:1pc;-webkit-text-size-adjust:none;color:#333}a{outline:0;color:#3498db;text-decoration:none;cursor:pointer}.system-message{margin:20px 5%;padding:40px 20px;background:#fff;box-shadow:1px 1px 1px hsla(0,0%,39%,.1);text-align:center}.system-message h1{margin:0;margin-bottom:9pt;color:#444;font-weight:400;font-size:40px}.system-message .jump,.system-message .image{margin:20px 0;padding:0;padding:10px 0;font-weight:400}.system-message .jump{font-size:14px}.system-message .jump a{color:#333}.system-message p{font-size:9pt;line-height:20px}.system-message .btn{display:inline-block;margin-right:10px;width:138px;height:2pc;border:1px solid #44a0e8;border-radius:30px;color:#44a0e8;text-align:center;font-size:1pc;line-height:2pc;margin-bottom:5px;}.success .btn{border-color:#69bf4e;color:#69bf4e}.error .btn{border-color:#ff8992;color:#ff8992}.info .btn{border-color:#3498db;color:#3498db}.copyright p{width:100%;color:#919191;text-align:center;font-size:10px}.system-message .btn-grey{border-color:#bbb;color:#bbb}.clearfix:after{clear:both;display:block;visibility:hidden;height:0;content:"."}@media (max-width:768px){body {padding:20px 0;}}@media (max-width:480px){.system-message h1{font-size:30px;}}</style></head><body><div class="system-message error"> <?php if(isset($message)){ ?> <div class="image"> <img src="http://cdn.demo.fastadmin.net/assets/img/success.svg" alt="" width="150" /> </div> <h1> <?php echo $message; }else{ ?> <div class="image"> <img src="http://cdn.demo.fastadmin.net/assets/img/error.svg" alt="" width="150" /> </div> <h1> <?php echo $error; }?></h1> <p class="jump"> 页面将在 <span id="wait"><?php echo($waitSecond); ?></span>秒后自动<a id="href" href="<?php echo($jumpUrl); ?>">跳转</a> </p> <p class="clearfix"> <a href=" :history.go(-1);" class="btn btn-grey">返回上一步</a> <a href="<?php echo($jumpUrl); ?>" class="btn btn-primary">立即跳转</a> </p></div>< type="text/ ">(function () { var wait = document.getElementById('wait'), href = document.getElementById('href').href; var interval = setInterval(function () { var time = --wait.innerHTML; if (time <= 0) { location.href = href; clearInterval(interval); } }, 1000);})();</ ></body></html>效果如下:
以上就是ThinkPHP中 自定义错误、成功、 异常提示页面的方法的详细内容。希望对大家有所帮助~~
下载链接:网站源码/小程序源码/网站模板下载
下载排行
- TP6框架全新开发社区系统源码开源
- Discuz地方城市门户模板 NVBING5绿色版 N5城市门户系列-V6 _GBK
- 陪玩2.0升级版源码/价值18500元的最新商业版游戏陪玩语音聊天系统源码
- ThinkPHP高仿蓝奏云网盘系统源码/对接易支付系统程序
- 最新仿720云全景制作源码|krpano仿720云全景网站源码
- 幸运九宫格抽奖系统带后台源码
- 点微同城系统整站源码 带pc端与小程序端+49款插件
- 全新博客社区资讯APP源码/Typecho后端
- 仿途牛养车省养车平台源码/买卖新车租车二手车维修装潢共享O2O程序源码
- Destoon7.0绿色行业B2B大气平台门户全站源码/带手机版+商务中心网站商城系统源码
最新发布
最新去水印小程序源码分享/无需后台/对接接口/支持全网去水印功能
群多多社群人脉H5-2.1.4多开插件+小程序独立前端+搭建教程
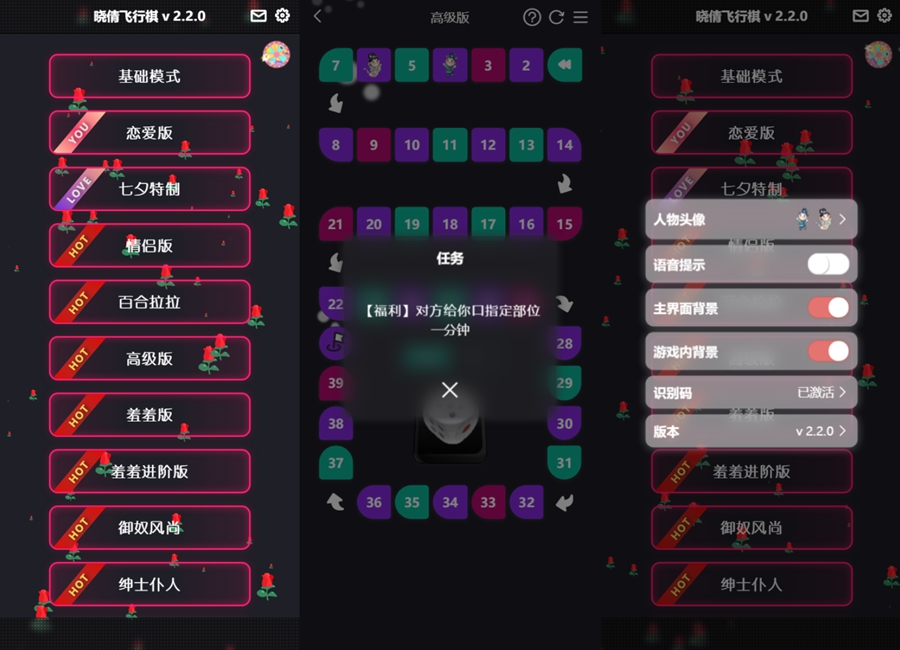
七夕情侣飞行棋游戏限定版本源码/解锁版

苹果CMS海螺模版V20修复版/加广告代码

宠物社区风格 商业版(GBK)Discuz模板
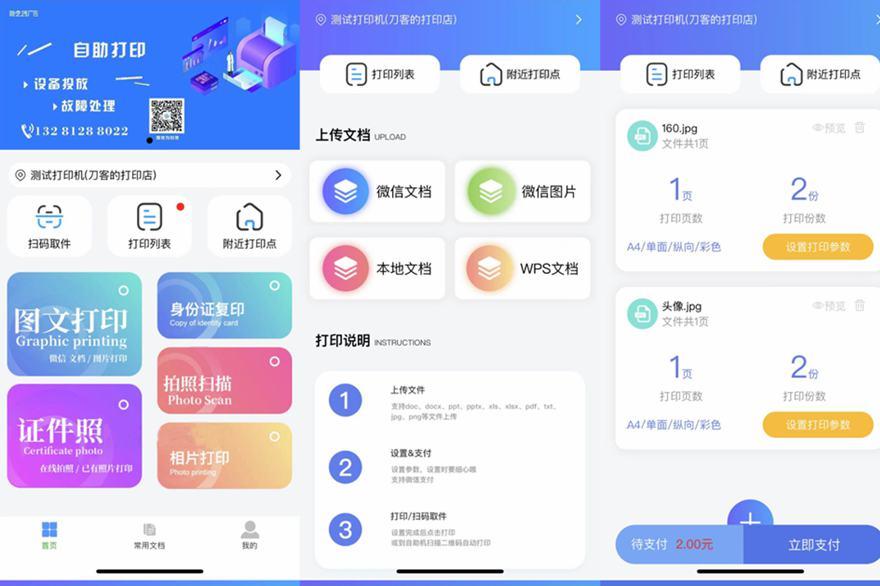
全新UI基于Thinkphp的最新自助打印系统/云打印小程序源码/附教程

易优CMS家纺家居装饰类网站模板/EyouCMS家具家居类企业网站模板

EyouCMS艺术***摄影工作室网站模板/易优CMS摄影工作室网站模板

易优CMS响应式精品茶具实木茶盘销售网站模板/EyouCMS响应式酒水饮料类企业网站模板

EyouCMS响应式推土机挖掘机机械类网站模板/易优CMS机械设备类企业网站模板